Get a Free Quote
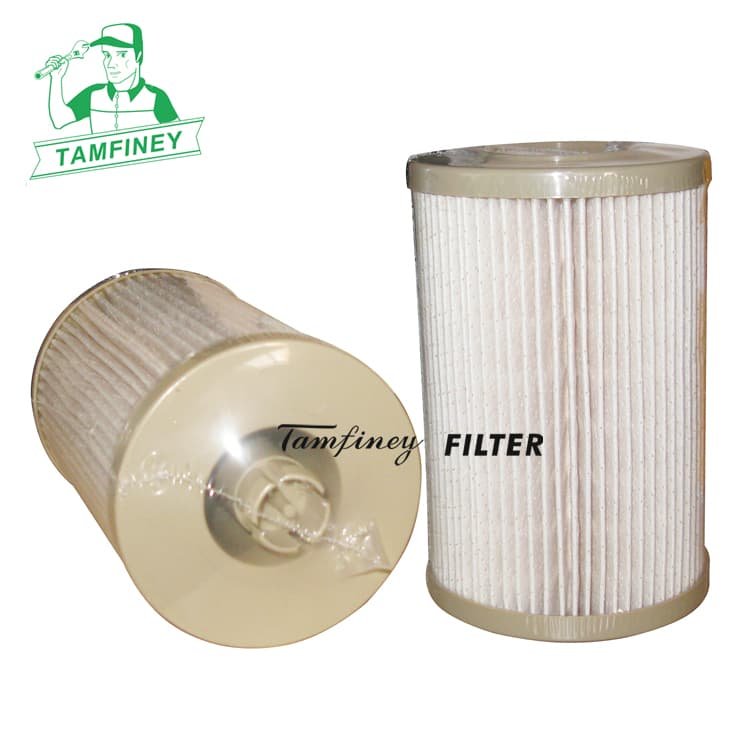
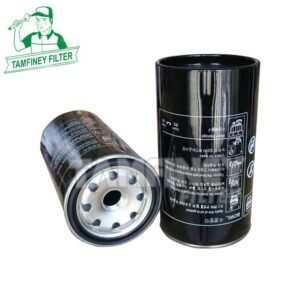
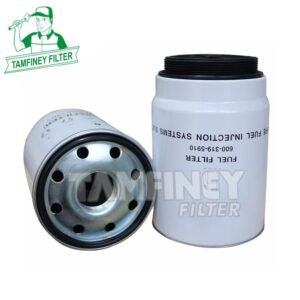
Professional John Deere Fuel Filter Replacement FS19957 RE520906 RE520306
Your best John Deere Fuel Filter Replacement FS19957 RE520906 RE520306 Fuel filter manufacturer in China.
Fleetgaurd FS19957 John Deere RE520906 RE520306


| Fuel Filter P553550 320/07382 P583087 16237815 Parameter: | |
| Part Number | P553550 320/07382 P583087 16237815 |
| Brand | Tamfiney |
| Weight | 457g |
| Height | 162 mm |
| Outer Diameter | 100/80 mm |
| Inner Diameter/ Thread Size |
M94 X 3 mm |
| Minimum Order | 100 PCS |
| Place of Region: | Zhejiang, China |
| Payment Terms: | T/T |
| Price Terms: | FOB |
| Lead Time: | 30 to 50 days based on order quantities |
| Market Type: | After Market |
| Current Export Market: | Southeast Asian,North America, South America, Western Europe, Eastern Europe, Africa, Oceania |
Applications:
• JOHN DEERE 1110 E IT41210 E IT41270 E ITA43 AFM 75-M16068 AFM 75-M26068 AFM 75-M36068 AFM 75-M46068 AFM 85-M16068 AFM 85-M26068 AFM 85-M3
• JOHNSTON 4045 SFM 85-M5
• LIEBHERR L 566L 580
• ROTTNE F 13F 15 CF 15 CF 18F 18 DH 11 CH 14 CH 20H 20H 20H 20 B
• RUBBLE MASTER RM 100 GORM 120
• SDMO R 275 C 3R 330 C 3R 330 C 3
• TIMBERJACK 1210 E1270 D1270 E Gen 11470 D ECO 31711 D
Professional John Deere Fuel Filter Replacement FS19957 RE520906 RE520306
Introduction: The Need for Reliable John Deere Fuel Filter Replacement
Reliable filtration is crucial for any John Deere engine. Because diesel engines often face tough environments, maintaining fuel purity becomes important. Often, poor filtration will cause clogs, costly repairs, or performance loss. Therefore, quality John Deere Fuel Filter Replacement solutions such as FS19957, RE520906, and RE520306 are essential. TAMFINEY ensures every filter meets strict standards, giving operators peace of mind.
Why Choose John Deere Fuel Filter Replacements from TAMFINEY?
TAMFINEY understands the needs of modern agriculture and construction professionals. Not only do our filters block impurities, but they also support maximum fuel flow. Whether you pick FS19957 or the RE520906 cross reference, consistent results are guaranteed. Furthermore, advanced filter media helps engines run smoothly, no matter how harsh the conditions. Because construction projects and farm seasons depend on uptime, our products deliver dependable protection year-round.
Expanding Your Options: Cross References for Flexibility
Sometimes, finding the exact John Deere fuel filter can be challenging. Fortunately, TAMFINEY's replacements—including RE520306—offer compatible alternatives. As a result, machinery downtime is minimized even during shortages. Moreover, each filter is tested to match OEM quality and exact fit. Whenever you choose a FS19957 or RE520906 variant, installation is simple and fast. Additionally, every model supports a full range of John Deere equipment, adding flexibility to your maintenance schedule.
Quality at Every Step: Tested and Guaranteed
Before shipping, TAMFINEY fuel filters undergo multiple quality checks. During these inspections, filtration efficiency and structural integrity are confirmed. Furthermore, our warranty covers 18 months or up to 70,000 kilometers, whichever comes first. As a result, operators do not worry about costly breakdowns after installation. Because durability matters, our filters resist harsh conditions as well as fuel variations. Therefore, customers experience fewer failures and lower lifetime costs.
Conclusion: Trust TAMFINEY for Every John Deere Fuel Filter Replacement
Regular fuel filter changes can make or break engine reliability. With TAMFINEY, you benefit from strong filtration, cross reference choices, and proven durability. Not only do FS19957, RE520906, and RE520306 cover all your needs, but they also deliver peace of mind. Therefore, choose TAMFINEY to keep your John Deere engines powerful, efficient, and ready for any challenge.
Q: Where is the fuel filter on a John Deere?
The position of John Deere's fuel filter varies depending on the specific vehicle model and engine type, but there are usually several common installation positions:
Built in: The fuel filter may be installed inside the fuel tank and combined with the gasoline pump. This design is common in many John Deere construction machinery or agricultural equipment, requiring the disassembly of the fuel tank for replacement.
External type: The filter may also be located at the oil pipe connection of the vehicle chassis, usually found by searching upstream (towards the fuel tank) along the fuel supply pipeline. This external design is convenient for daily inspection and replacement.
Q: Why does my lawn mower run for 10 minutes then dies?
The lawn mower stalls after running for about 10 minutes, which is a common issue usually related to fuel supply, ignition system, or engine overheating. Based on the situation you described, I have compiled the following most likely causes and corresponding troubleshooting steps for you.
🔧 Main cause analysis and troubleshooting methods
You can check in order from simple to complex, which can help you quickly locate the problem.
1. Fuel system issues (most common)
Blockage or improper adjustment of carburetor: After running the lawn mower for a period of time, the oil circuit or fuel injector of the carburetor may be blocked by impurities or gum, resulting in insufficient fuel supply. Especially when the throttle is increased, if the mixture is too lean, the engine will stall due to "shortness of breath". For a new engine, it may be due to improper initial adjustment of the carburetor; For old engines, carbon buildup in the carburetor is a common cause.
Troubleshooting method: First, check if the fuel is sufficient. Then, if conditions permit, you can try cleaning the carburetor, especially the main oil needle and oil passage. Attention: Cleaning the carburetor requires some hands-on ability. If unfamiliar, it is recommended to seek professional help.
2. Ignition system malfunction
Spark plug issue: Carbon buildup on the spark plug, excessive electrode gap, or breakdown can lead to insufficient ignition energy and inability to sustain ignition of the mixture, resulting in flameout. Especially after the engine temperature rises, the malfunction may become more apparent.
Troubleshooting method: Check and clean the spark plug electrode, adjust the gap to the standard value (usually 0.6-0.8 millimeters). If the spark plug ages or is damaged, the most effective solution is to replace it with a new one.
3. Engine overheating
Reason: The air filter is too dirty and clogged, which affects the intake and heat dissipation; The heat sink is covered with dust; Insufficient or excessive engine oil; Overloading of the engine (such as too wet or too dense grass) can cause the engine to overheat, leading to engine shutdown protection or power loss.
Troubleshooting method: Check if the air filter is too dirty, clean or replace it in a timely manner. Check if the oil level is between the markings and ensure that the oil quality is good. Ensure that homework is not overloaded.
4. Other possible reasons
Tight fuel tank cap: If the fuel tank cap is tightened too tightly, it will hinder the balance of air pressure inside and outside the fuel tank, causing the fuel to be unable to be smoothly sucked out and resulting in insufficient fuel supply. You can try loosening the fuel tank cap slightly after refueling before starting.
Exhaust pipe blockage: For two-stroke engines, exhaust pipe blockage can cause the exhaust gas to be unable to be discharged, especially when the throttle is increased, which can easily cause "suffocation".
💡 Suggested troubleshooting process
To solve the problem safely and effectively, we recommend that you follow the following steps:
1. Basic inspection: First, confirm that there is oil in the fuel tank, the throttle switch is in the "ON" position, and whether the fuel tank cap is tightened too tightly.
2. Cleaning priority: If the lawn mower has been used for a period of time, check and clean the air filter and spark plug first. This is a low-cost step that can solve most problems.
3. Targeted treatment: If the problem persists after cleaning and the engine stalls when the throttle is increased, it is likely to be a problem with the carburetor and requires cleaning or professional adjustment.
4. Seeking professional help: If you are not familiar with the engine structure or if the above steps cannot solve the problem, for safety and equipment lifespan, it is recommended to send the lawn mower to a professional repair shop for maintenance.
Q: How do you clean a carburetor on a lawn mower without removing it?
Cleaning a lawn mower without disassembling the carburetor is a simple method that can effectively remove surface dirt and some internal carbon deposits. However, it is important to note its limitations as it may not be able to thoroughly clean key areas such as fuel injectors. Here are several common methods that you can choose according to your actual situation:
Use specialized cleaning agents (recommended)
This is the most commonly used and relatively safe method, and safety precautions should be taken during operation (such as wearing gloves).
• Preheat the engine: Start the lawn mower and let it run for a few minutes to bring the carburetor to operating temperature, which helps the cleaning agent dissolve dirt better.
• Dismantling connecting components: Turn off the engine, wait for it to cool down, and then remove the joint between the air filter and carburetor to directly spray the cleaning agent.
• Spray cleaning agent: Restart the engine to idle or medium speed, align the cleaning agent nozzle with the carburetor air inlet, and slowly and evenly spray it (to avoid excessive spraying that may cause stalling). After spraying, let the engine continue to run for a few minutes to fully utilize the cleaning agent.
• Observation effect: If too much is sprayed, the engine may stall. At this time, you can quickly step on the accelerator to reignite it, and the exhaust pipe will emit white smoke, which is a normal phenomenon.
Use salad oil or gasoline
These methods are suitable for treating surface oil stains, but caution is required during operation.
Salad oil method: Soak a clean cloth in salad oil, cover it on the surface of the carburetor, let it stand for about 10 minutes to soften the stains, then gently brush and wipe with a brush. Salad oil can dissolve oil stains and is not easy to damage the carburetor.
Gasoline method: Soak the carburetor in gasoline for about 10 minutes, then take it out and wipe it with a cloth and let it dry thoroughly (residual gasoline may pose a safety hazard).
Use detergent
Suitable for removing carbon deposits and external oil stains.
• Mixed cleaning solution: Mix soapy water, baking soda, and water in proportion, heat and cool, and use a brush to dip along the carburetor pattern to clean the outside. For the interior, mechanical feather removal or vacuum cleaner can be used to clean dust and oil stains.
Precautions
• Limitations: Non disassembly cleaning mainly targets surface and intake duct dirt. If the carburetor is severely clogged or has poor performance, it still needs to be disassembled for deep cleaning.
• Safety first: Keep away from sources of fire during operation and ensure that the engine is ventilated and dry after turning off before operation.
• Regular maintenance: After cleaning, test the operating status of the lawn mower. If the problem persists, it is recommended to have it professionally inspected.
When choosing a method, priority should be given to specialized cleaning agents as they are highly targeted and safe; If the dirt is light, the salad oil method is more environmentally friendly. Regardless of the method, patient operation is necessary to avoid damaging the carburetor.